If you have a limited bandwidth internet connection, you will always face a data problem in Oracle VM VirtualBox because you don’t have unlimited internet, and VirtualBox running OS consumes all the internet data in the background without any notification. You can install multiple OSes and run them simultaneously, but if the internet connection is active in your main Host OS, you will not know when your data is finished.
This is because your VirtualBox running OS works the same way as your main host OS. Just as your main host PC updates Windows or other OS in the background, VirtualBox OS updates in a similar manner. VirtualBox uses your main Host OS’s internet for the update, causing all the internet data to be used up automatically.
Yes, you can disable Windows (OS) Update in VirtualBox OS, but it only disables the OS update. So, if you want your VirtualBox OS not to use the Internet of your main operating system, I’ll tell you how you can disable internet access to all VirtualBox running OS.
Disable Virtualbox Internet Access:
You can disallow internet access to VirtualBox in two ways:
Method 1:
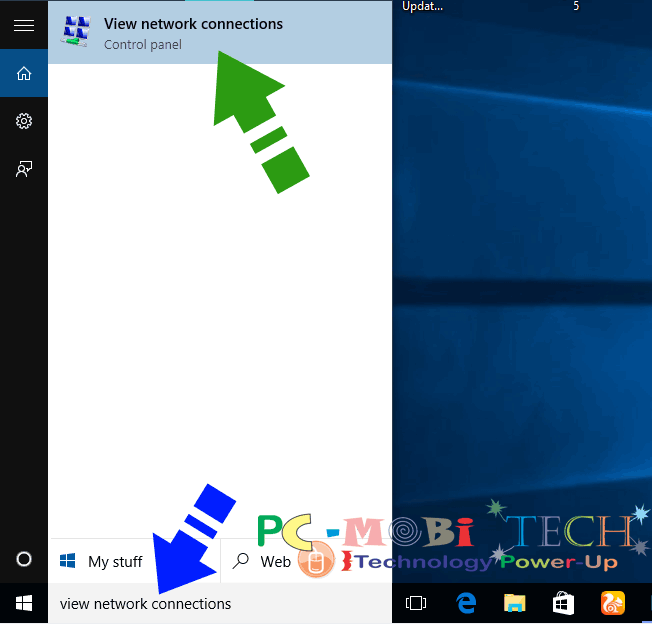
If you are running a Windows OS in VirtualBox, try this:
- Search for “View network connections” in the search bar and hit enter.
- In the Network Connections, right-click on the available network connection and choose the “Disable” option (If you already have activated the Internet) from the context menu.
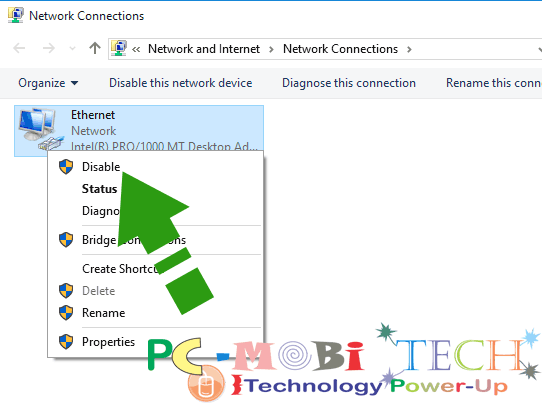
- If you are using any other OS, then you will need to find out the Network option in System Settings (Control Panel) and disable it.
Also See:
- How to Install a Guest OS in Oracle VirtualBox?
- Share Clipboard, files, folders & drives in VirtualBox.
- Virtualbox: Fix full-screen problem for all OS
- 3 Easy ways to share files, folders & drives in VirtualBox.
Method 2:
This process works with all Operating Systems such as Windows, Mac OSX, Linux, Ubuntu, Solaris, BSD, IBM, etc:
- First, shut down (Power off) the VirtualBox installed OS.
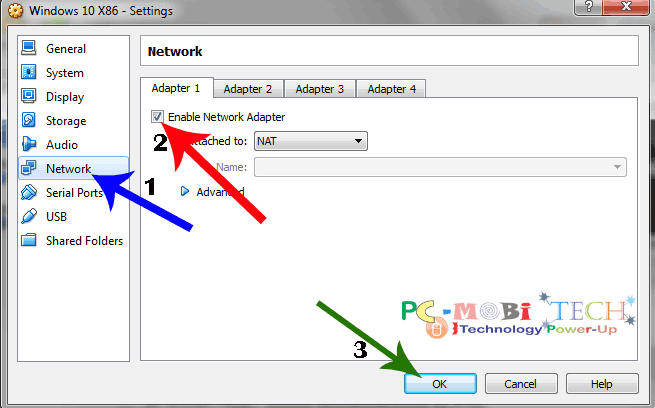
- After powering off the OS, start Oracle VM VirtualBox Manager. On the main screen, select your OS in which you want to disable the internet connection and click on “Settings” from the top.

- In the “Settings” dialog box, select the Network option from the left pane. After this, you are in Network; here, untick the “Enable Network Adapter” checkbox and click on the “OK” button to save changes to the settings.
Or, if you don’t want to power off (shut down) the running machine, then follow this:
- Click on the “Devices” Menu and select “Network Settings” in the “Network” option.
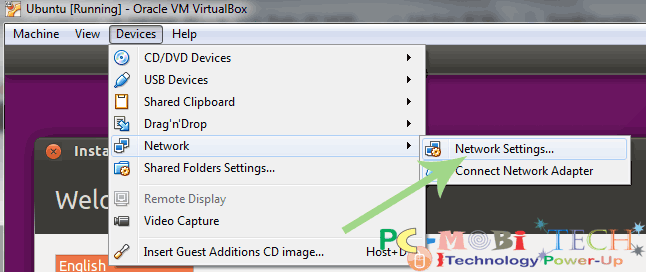
- The Settings Dialog box will appear; now, untick the “Cable Connected” option and click on “OK” to save changes.
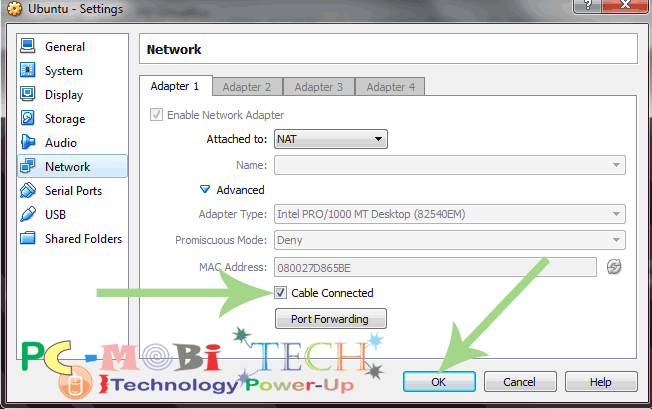
Now your internet connection is disabled successfully. If you want to re-enable the network connection, then follow all the above steps again, but you will need to tick the “Enable Network Adapter” and “Cable Connected” checkboxes.
When you purchase through links on our site, we may earn an affiliate commission. Read our Affiliate Policy.