Download the latest BlueStacks offline installer from the official site to experience the power of this Android operating system emulator. Bluestacks allows you to seamlessly run Android smartphone apps on your Windows 7, 8.1, 10, 11, or Mac computer. Initially launched in beta on October 11, 2011, and officially released on April 13, 2014, Bluestacks has evolved. While the original offline installer was a mere 102MB, the current version exceeds 500MB, providing a robust solution for those keen on running Android apps on their PC. Since its inception, Bluestacks has gained immense popularity, becoming a top choice for users seeking to enjoy mobile apps on their desktop or laptop
When you want to download Bluestacks from the official website, you may come across a split installer setup, which is only about 12Mb in size. However, this requires an internet connection to complete the installation. If you prefer to install Bluestacks without an internet connection, you can opt for the full version offline installer instead. Unfortunately, many people are not aware of this option. To help you out, we’ve put together a comprehensive guide on how to download and install the Bluestacks offline installer for Windows 7, 8.1, 10, 11, and Mac PC.
Download BlueStacks for Windows 7, 8.1, 10, 11 & Mac PC from official Site?
Bluestacks is an Android emulator which means that it can virtually run Android OS & applications on Windows and Mac PC. It runs all apps that available for download in official Google Play store.
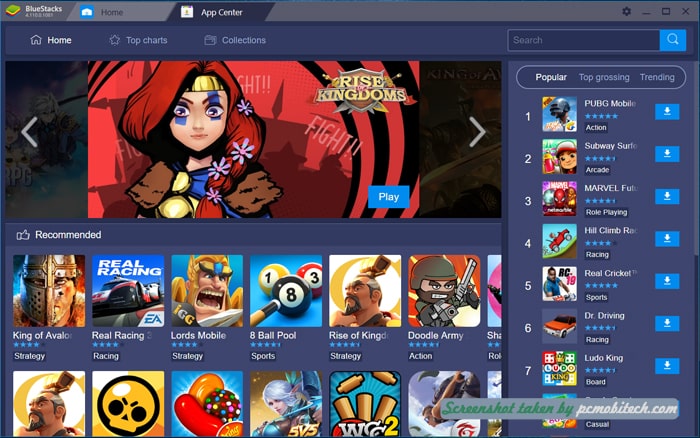
It is useful for a pc user, you can play all the Android mobile apps on your windows and Mac for free. You can download all apps from Google play store & mobile app store that include in Bluestacks App Player.
Download the Latest Bluestacks offline installer for Windows & Mac
Click on the download button to download Bluestacks for Windows XP, Vista, 7, 8, 10, & 11:-
Get 32 Bit Version
Get 64 Bit Version
Download latest Bluestacks offline installer for Mac-
Get Mac Bluestacks
Must See:
How to Install Bluestacks on PC (Windows)?
Installing Instruction-
Once downloading finishes, you can follow the simple instructions as follows –
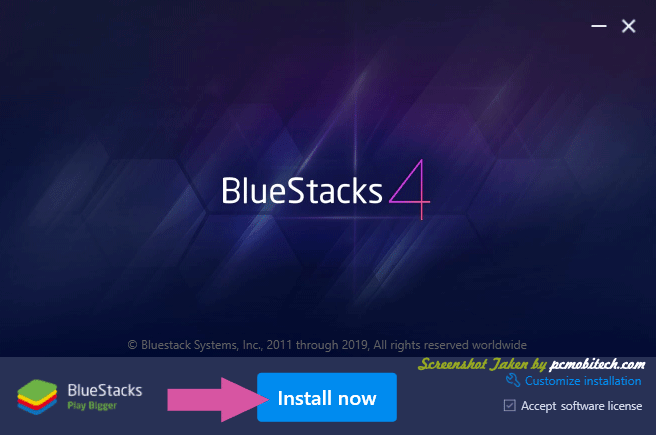
- 1- Open the Download Folder and Double click or open BlueStacks-Installer file, Installation started automatically, If you want to install Bluestacks in default directory then click on the Install now button. If you want to change installation directory then click on the Customize installation link, which is available at bottom right of the setup screen.
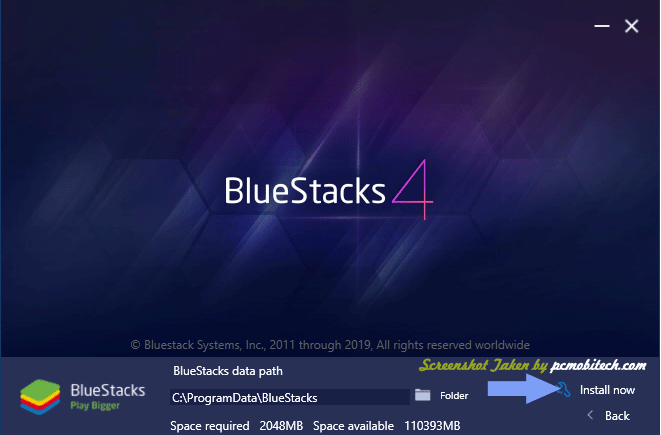
- 2- If you click on the Customize Installation link then you can change BlueStacks data path by choosing a different folder or drive. After changing installation path, click on the Install now link which will be available at bottom right section of the setup screen.
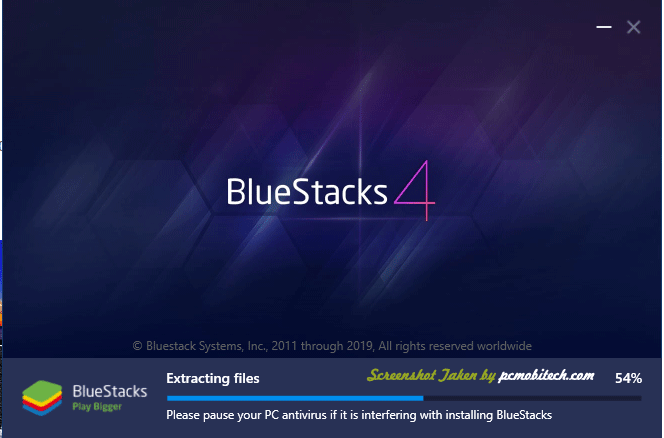
- 3- Now installation will be started and you will have to wait for few seconds or minutes (depends on the hardware).
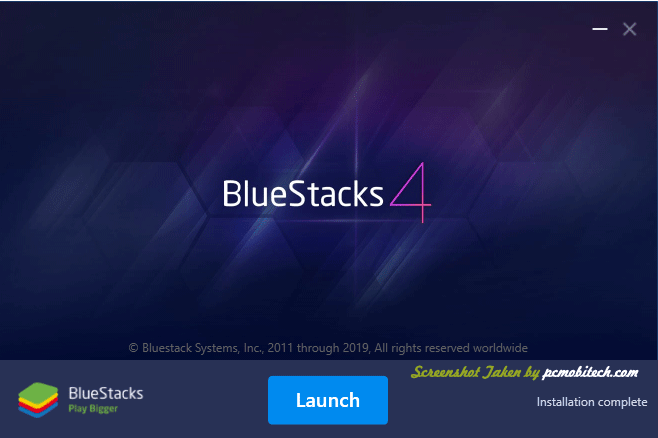
- 4- Once installation finishes, you can click on the Launch button to immediately start the Bluestacks Android Emulator.
Also See:
- Top 5 free Android Emulators For Windows 7, 8, 10 & 11.
- How to Download & install Andyroid Android app emulator on Windows PC.
Now you can start using Bluestacks on your PC and download all games like Subway surfers or Temple run from Google play store.
When you purchase through links on our site, we may earn an affiliate commission. Read our Affiliate Policy.



it fails to install in my window 7 32bit 2GB Ram
I am using a whats app on Bluestacks, I’m calling friends but they are unable to hear my voice, but i can hear their voice! help on how to fix it
NOT DOWNLOADING ON WINDOWS 7
You can download it on your mobile and sent it to your computer through the USB.
very good software,
i cant install any app from my pc to it.
its work too slow
blueStacks is failing to get installed in ma pc
this virson not work. slow loadding and intalling fill name rong