In my previous post, I explained how to block all ads with Adblock Plus in Firefox. Now, let’s talk about how to solve the AC3-DTS audio problem in MX Player, which many users have faced since the 1.7.33 update. MX Player is one of the best video players for Android smartphones and tablets, offering full control over videos on your device. However, with the latest update, MX Player removed support for two audio codecs, AC3 and MLP, due to licensing issues. This means that certain videos may not have sound when played on MX Player.
But don’t worry! You can still play videos with AC3 and MLP audio formats on MX Player by downloading and installing custom codecs. With these codecs, you can restore the audio support for AC3 and MLP formats with relatively little hassle.
So, if you’re facing the AC3-DTS audio problem in MX Player, simply download the custom codecs and follow the instructions to install them. This will allow you to enjoy your favorite videos with sound once again on MX Player.
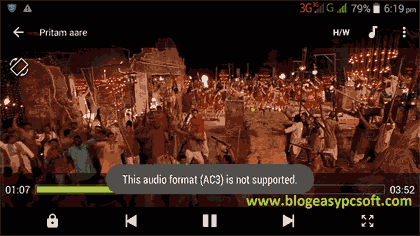
Solve AC3-DTS-MLP Audio Problem in MX Player
First, find out that which custom codecs support your device-
1- Open MX Player & tap on menu option key.
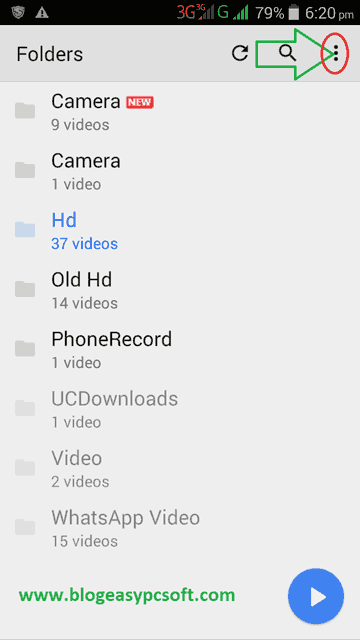
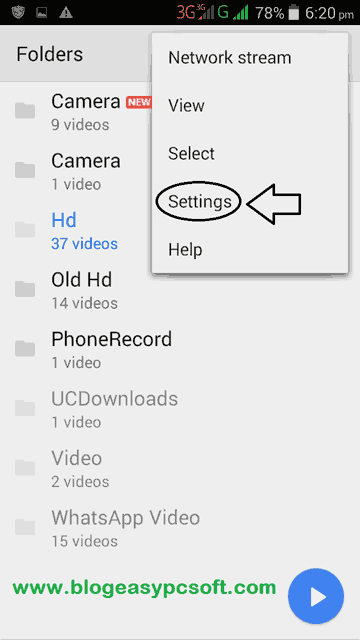
2- Tap on Settings.
3- In the MX Player Settings Tap ‘Decoder’ option.
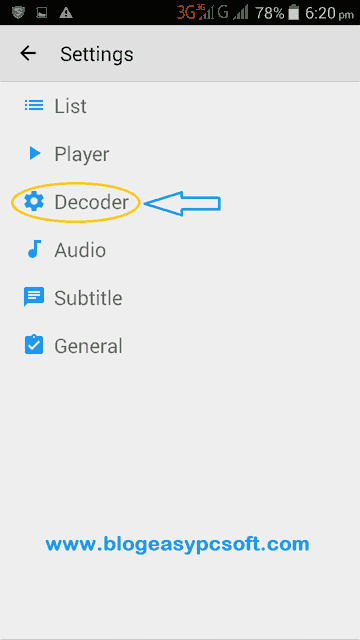
4- In the Decoder scroll down the list and at last option you can see your device supported custom codecs.
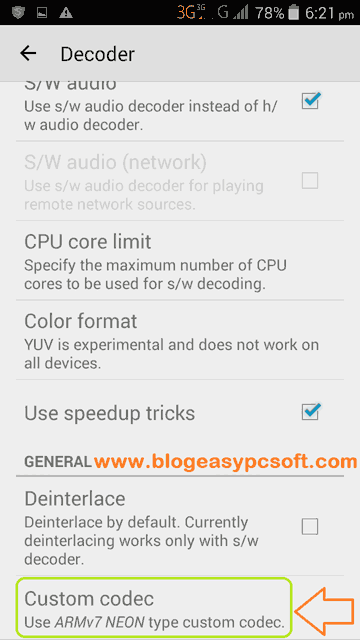
Download Custom Codecs for your device
- 1- Go to custom codecs download page- Click here to go. On this page, you will see the left side file name with the link, Tap on custom codec link (x86, x86_64, neon, neon64/ARMv8) that you find in MX player.
- 2- As soon as you click on the link, a popup message appears then tap on Download option.
- 3- Download begin.
How to install Custom Codecs
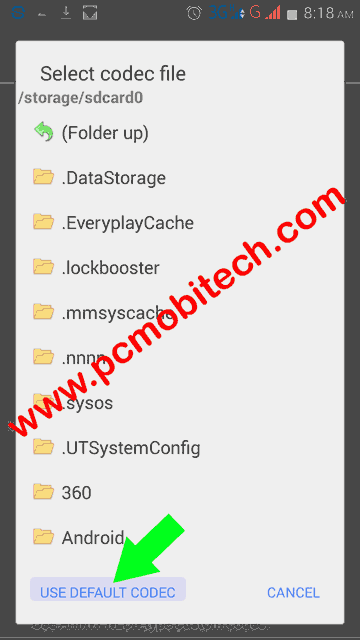
After download custom codecs, you will need to install in MX Player. Follow same steps as above (Open MX Player>Go to Settings>Decoder>Scroll down to last option) & Tap on Custom Codecs.
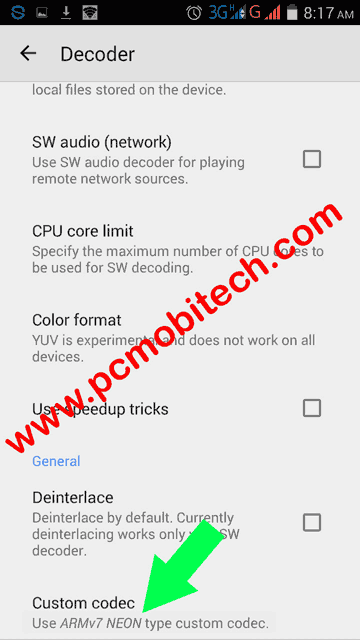
An Explorer window open. Now find your custom codecs location where you saved it. You can use the tap on the folder to go in inside folder & ‘Folder Up’ to go side-up (If you downloaded custom codecs with Firefox, Chrome then it will save into Download Folder by default. If you used UC Browser then it will keep into UC Download folder.)
When you will find out then just tap on Custom Codecs. Now your custom codec has been installed. Tap on OK to restart the application.

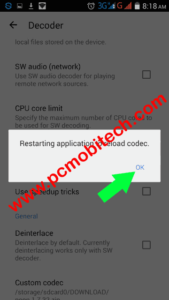
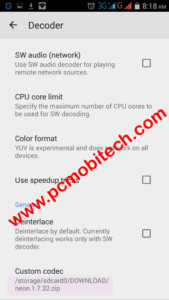
If You are facing any problem & error with the custom codec or you don’t want to use this custom codec by default then tapping again on ‘custom codec’ (Open MX Player>Go to Settings>Decoder>Custom Codec) option & tap on ‘Use Default Codec’.
Must see:-
- How to play dual or multi audio movies – video with MX Player
- How to watch hidden Videos files On Android Phone with MX Player
- 5 Video Players that can play all Videos & AC3 audio on Android.
MX Player starting / crashing problem:-
After the custom codec installed MX player is not starting, or have frequent crashes. So go to the settings of your smartphone >> Tap on the Apps or Application Option >> in the Apps or Application tap on the MX Player.>> Now tap on “Clear Data” button. MX Player will reset to default state.
Realted source: forum.xda-developers.com
If you have any problem, question, suggestion then please share with us.
When you purchase through links on our site, we may earn an affiliate commission. Read our Affiliate Policy.




Thanks. Terribly helpful. XDA-Developers opens absolutely nothing.
More than a little frustrating.
Mx keeps crashing even after clear data since the custom codec. Any ideas?
Clear it data and uninstall it then reinstall the MX Player.
When I click on codec link, expected page is not opening.
Thank you very much for this information!
You are Welcome.
I was having this problem for a long time but not anymore. Thanks for sharing this information in here.
Thank you so much
Thanks