Have you noticed while connecting to a network for the first time, a pop-up option that asks you to set the network as ‘Public’ or ‘Private’? Here actually begins the journey of Public Network Vs Private Network. The setting of Public Network or Private Network in Windows 10 actually enables you to choose if you want your computer to be discoverable to other devices available on the network. By knowing your preference, Windows 10 channelizes the right settings as per your network choice.
In this post, we will dive deep into the world of Public Network and Private Network to understand their key differences. Later, we will also understand how to change from Public to Private or Private to Public Network. So, without any further ado, let us get started right away-
Introduction to Public Network & Private Network
In the simplest form, a private network can be understood as a network that is not available for the public use while on the other hand, the public network offers accessibility for the public use.
Let us understand this with an example-
Imagine you are configuring a network for the first time and Windows asks you about your preference- to choose this network as a public network or private network. The message that you will see at this stage is-
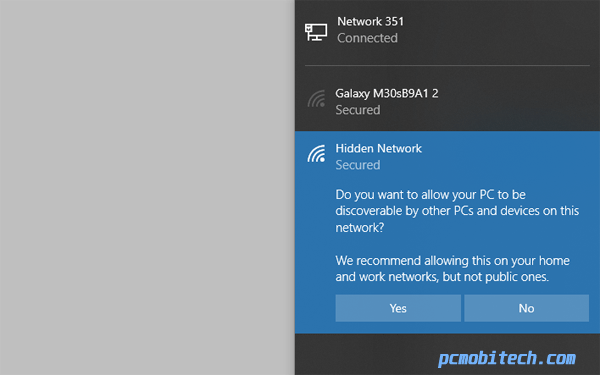
“Do you want to allow your PC to be discoverable by other PCs and devices on this network? We recommend allowing this on your home and work networks, but not public ones.”
(Below this message, you will get two buttons named as ‘Yes’ and ‘No’. You are supposed to choose the one as per your choice.)
The actual meaning of this message of Windows is that if your network is an internal network where you are well relaxed about your data safety and other security then you can opt for the private network. But if your network is going to function in a hostile environment where hacking, data theft or other security concerns may arise then you should choose the public network, so Windows offers the top-notch security and powerful control.
Let us now have a look upon the suggestions that Windows 10 gives for both of these networks-
Private Network

While first time connecting to any Wi-Fi network, you should opt for Private Network if you trust the network, for instance, the network at your home or workplace. As discussed above, with a private network, your PC can be found by other devices connected to the network. This will enable you to use your computer for printer and file sharing.
Public Network
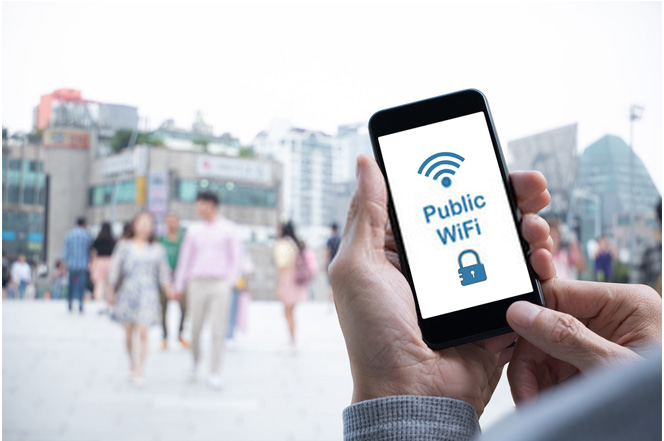
When you are first time connecting to any Wi-Fi network, you should choose Public Network if you do not trust that network because it is available at some public places such as a Wi-Fi network at a restaurant. By opting for Public Network at such places, you will hide your PC from other devices connected to that network. Here, you will also not be able to do file and printer sharing.
Additionally, another key difference between Public Network and Private Network is that Private Network is designed by you in different IP address scheme for instance 192.168.1.x till 192.168.1.254, while in public Network, your Internet Service Provider or ISP gives you with IP address. Here, one key thing to notice is that once you connect to a network for the first time, you will be allowed to change the network to public or private at any of the time.
Let us now have a look upon the steps that will let you set up a WiFi network to private or public for the first time connection-
Setting a Wi-Fi network to public or private when you first connect in Windows 10
Some of the key steps that will let you set a public or private network with your first-time connection via a Wi-Fi network-
- You need to go on the right side of the Taskbar, and there you should choose the Network icon.

- In the second step, you need to choose the Wi-Fi network you wish to get connected to, and later, you should choose Connect.
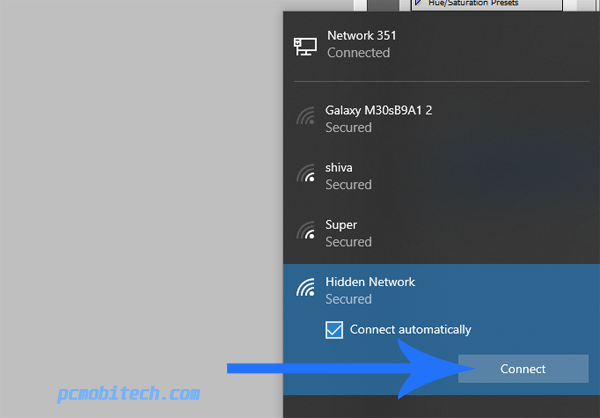
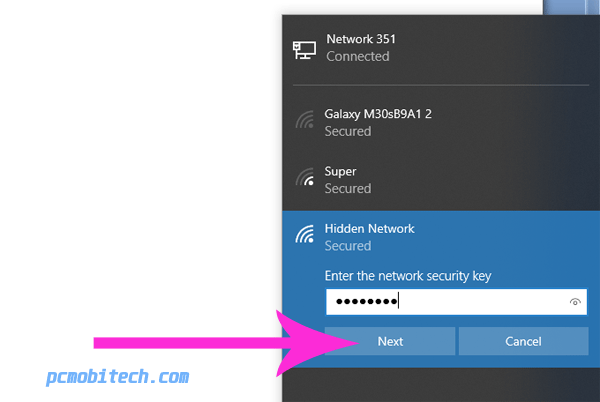
- Then in the third step, you should type the network password and then you should choose Next.
- Now, you will be asked if you want your computer to be discoverable to other devices on the same Wi-Fi network, you need to perform below given two steps-
-
- For setting your network as a private network where your computer can be accessed to other devices on the same network then you should choose ‘Yes’.
- For setting your network as a public network where your computer cannot be accessed to other devices on the same network then you should select ‘No’.
Now, as you understood everything about Public Network and Private Network, let us now delve into some easy steps to change the network from Public to Private or Private to Public in Windows 10-
Steps To change a Wi-Fi network from Public to Private or Private to Public in Windows 10
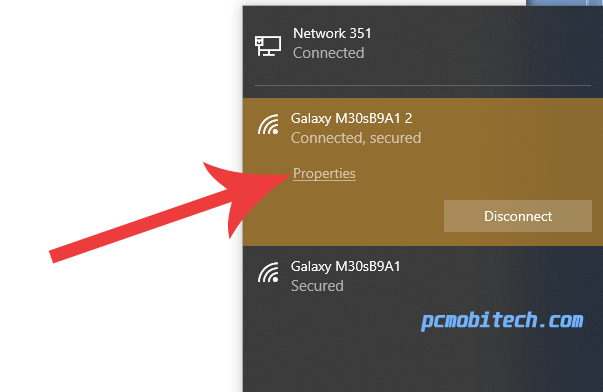
- You need to go to the right side of the taskbar of your computer and then you should choose the Wi-Fi network icon.

- Then you need to go under the name of your Wi-Fi network that you have chosen for the first time to get connected to and there you should choose Properties.
- Now, in the final step, you should go under the Network profile, and there you should choose Public or Private.
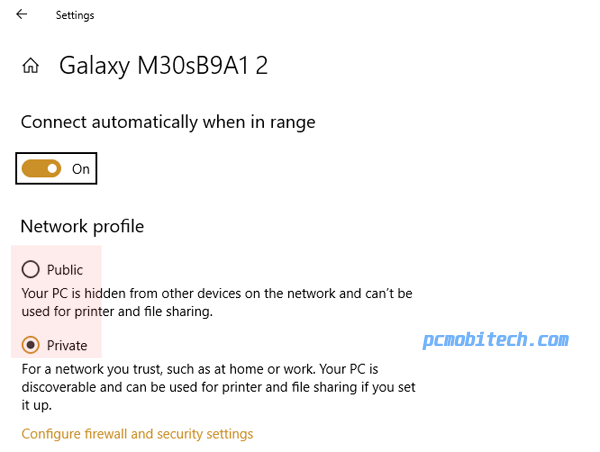
This way, you will be able to change your Wi-Fi network from Public or Private to Private or Public in Windows 10.
Final Thoughts about Public Network & Private Network!
On the concluding note, we hope that you would have understood what Public Network and Private Network are. You must have gone through the differences in between both of these networks, so you can make the right choice for your connection. The aforementioned steps will also help you change your network from ‘Public to Private’ or ‘Private to Public’ in Windows 10 quite adeptly. Still, having any doubts about Public and Private Networks? Then feel free to ask us in the comment section below.
When you purchase through links on our site, we may earn an affiliate commission. Read our Affiliate Policy.