Do you use Eset Internet Security Antivirus on your Windows Laptop? Then you’ll have seen an Anti-Theft feature in the Tools section of the Internet Security. If you didn’t know about the Anti-Theft then first understand that What the feature has the specialty? Let’s understand
“The Anti-Theft is a powerful tool which may help you to get back your device when you lose or someone steals.” Suppose, you’re traveling and during the travel you forgotten your device on a place. So you will have very little chance, in which you will be able to get your device back. If the Anti-Theft will have enabled on your device then it can be tracked via Eset Anti-Theft online account.
But the condition is your device must be switched on and running with Internet data enabled, Otherwise the device can’t be tracked online.
The Eset Anti-Theft feature is also available on Mobile Security Android. So you can also protect the Android Smartphone with Mobile Security version if you’re using. But the Anti-Theft activation is a bit different from Mobile Security Anti-theft. Therefore I’m sharing full activation process for Eset Internet Security Anti-Theft.
Full Activation ESet Internet Security Anti-Theft On Windows
To enable or activate ESet Internet Security Anti-Theft on Windows Laptop, follow the below steps carefully
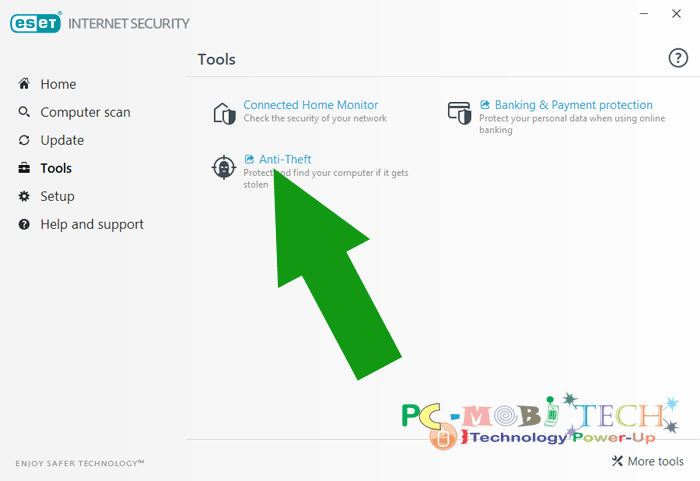
- Open the ESet Internet Security Interface and click on the Tools option from the left pane. And you’ll see Anti-Theft option. To start activation process click on the Anti-Theft.
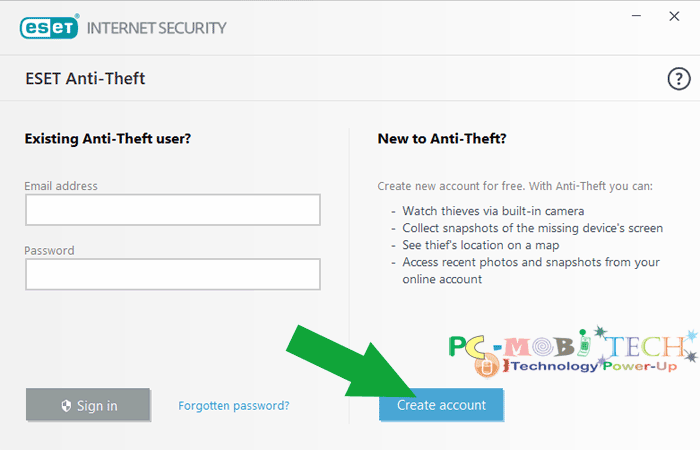
- Now you’ll see create a new Anti-Theft account screen. If you already have an existing Anti-Theft account, then it can be also used for sign in. To create a new account click on the Create account button.
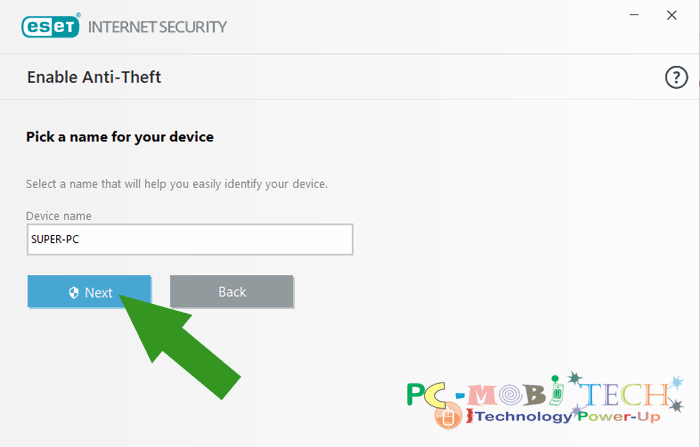
- Next, Enable Anti-Theft: Pick a name for your device screen will appear. Here you can enter any name for your device, type a Device name and click on the Next button.
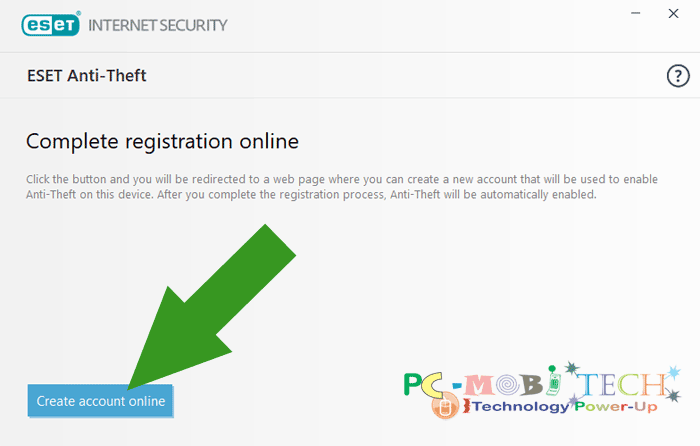
- On the Next screen, Complete registration online dialog box will appear. Here click on the Create account online button.
- Now, Create new account window will open in the default Browser, where you’ll need to fill some of your personal information, such as Name and Surname, Email, Password, and your country.
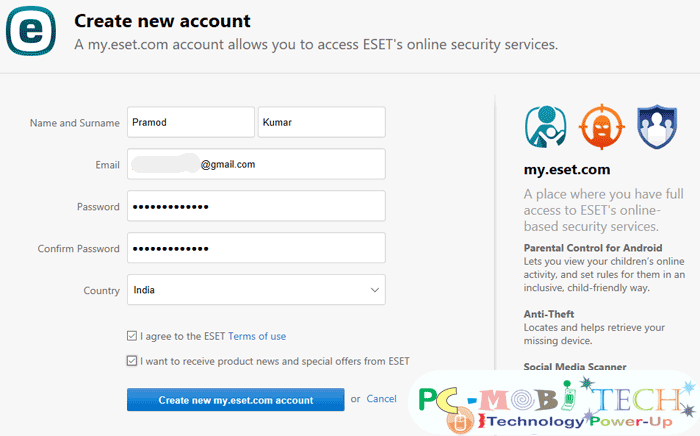
- After entering your info, tick the checkbox I agree to the Eset terms and use checkbox. And if you don’t like to receive news or product updates from Eset, then uncheck the checkbox of I want to receive product news and special offers from ESET. So you’ll not receive any special offers or news. Finally, Create new my.eset.com account button.
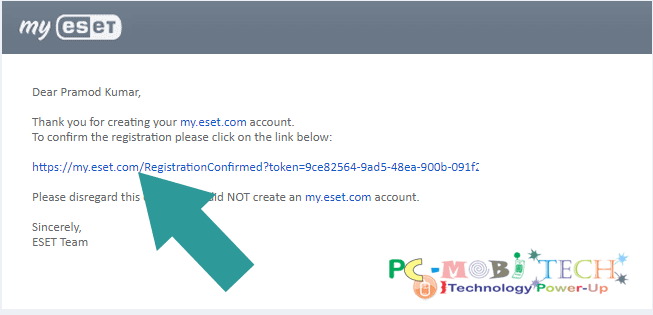
- After creating the account, you’ll get a confirmation mail on your registered Email ID. So go to the Email account and open the received message, to confirm your Email ID, click on confirmation link.
- Now you have successfully signed up the ESet Internet Security Anti-Theft account.
Optimize your device for better tracking
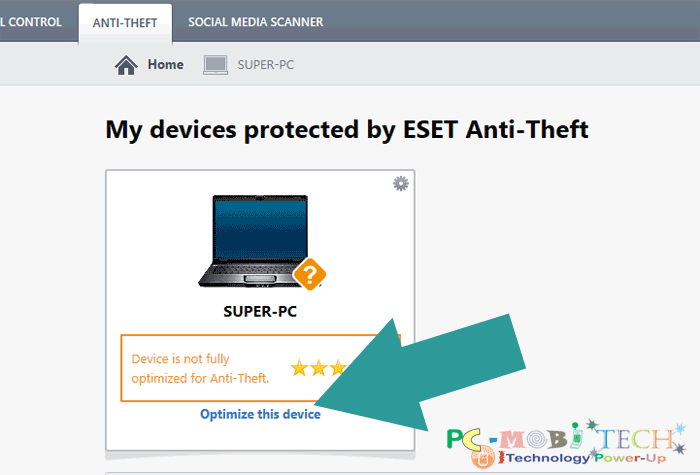
After sign up for new ESet Anti-Theft account, you’ll need to optimize your device for better monitoring. If you don’t do this, the device tracking will not be possible. Once you login to your Anti-Theft account first time, a notification related to Device optimization will be shown on the screen. To optimize the device click on the Optimize this device link.
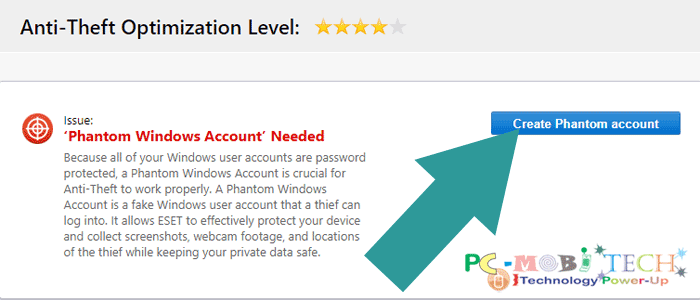
Anti-Theft Optimization Level screen will appear, here you see an issue or warning which is related to Phantom Windows Account. As we all enable password protection on our Windows Laptop, In a case when we lost the laptop, and someone will get it then he/she will not be able to login to your Windows and will not be able to connect it to the Internet. So tracking system on Windows Laptop will not work.
Hence, The Phantom Windows Account is needed. After creating Phantom Windows Account, another user account will be added to your Windows. After losing, who will get It, will try to login but it is not possible to login to the password-protected account, So he/she will try to login Windows Phantom account, which will be a fake account because your all other files will remain safe and hidden. But in the Phantom Windows account, ESet Anti-Theft will try to collect screenshots, Webcam footage, and location, etc. These photos and recordings and location will be available in the Anti-Theft account.
Create a Phantom Windows Account
You must have understood now, Why is Anti-Theft asking you to create a Phantom Windows Account. To Create a Phantom Windows account, click on the Create Phantom account button.
Once you click on the button. Set up a “Phantom Windows Account” screen will appear. Here enter a new Fake Windows user account name and click on again Create Phantom account button.
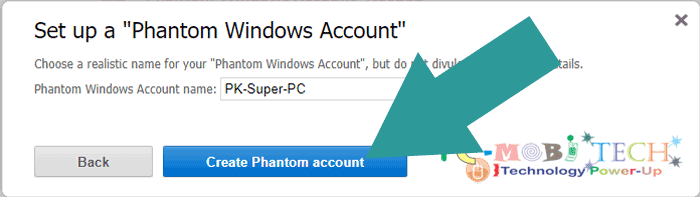
After creating a Phantom User account, you will get a message: “Your device is optimized for Anti-Theft.” So Anti-Theft feature is now successfully enabled on your Windows Device.
You May Also Like:
- Track Windows Laptop Online Using ESet Anti-Theft.
- Download & Install Latest Eset Internet Security Antivirus, Eset Smart Security Offline.
- How to Secure an Android Smartphone?
- Can We Protect Our Privacy on Android Smartphone?
Run an Anti-Theft Test
But still, you’ll need to do some more optimization, to make Anti-Theft feature entirely start working. You can Run a test on your device. Once you create a Phantom account, you can Run an Anti-Theft Test, so that ESet Anti-Theft will enable necessary security options. And also you can adequately ensure that Anti-Theft feature is working or not before taking a Cheeriness.
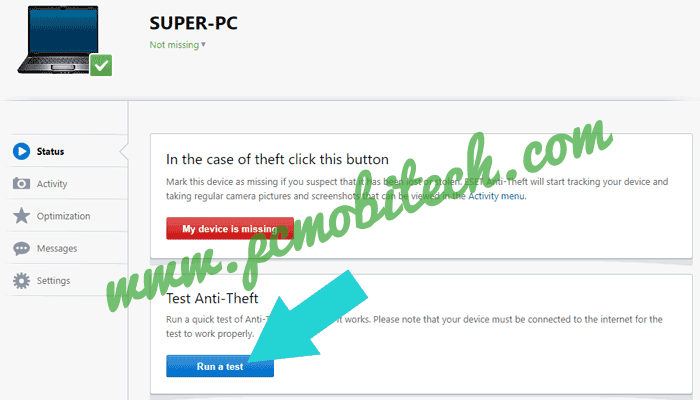
Hit the Run a Test button. And you’ll see Test is running… It may take a few minutes to finish. Now wait for some minutes, and you’ll see an Eset Anti-Theft Test message on your device screen, which will ask you to allow some collection of information from the device, such as Screenshots, Webcam Photos Capture and recording, and location, etc. This is essential step otherwise Anti-Theft feature won’t work. So click on the Allow button.
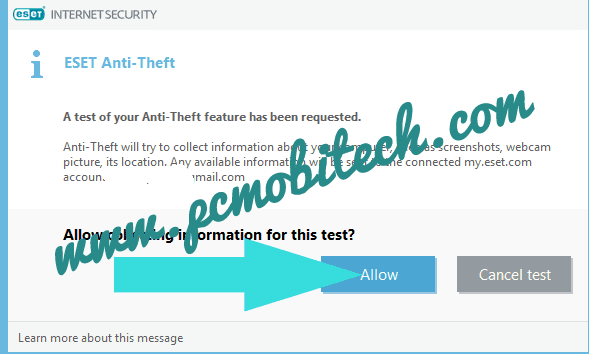
And it will start taking pictures and locations and Device IP address, which will be available in the Anti-Theft Activity tab.
 Please also ensure that the Location service must be enabled on Windows, otherwise, the Laptop will not be traceable. I hope that you have now a fully working Eset Internet Security Anti-Theft feature on Windows Laptop. If you have any question related to the topic, please leave the message in the comment box.
When you purchase through links on our site, we may earn an affiliate commission. Read our Affiliate Policy.