Windows 10 is now available, and many people are attempting to install it on their computers. Some are installing Windows 10 on virtual machines, such as the Oracle Virtual Box virtual machine or VMWare, to experience the new look. Those whose computers have DVD drives are installing Windows 10 using a DVD. However, for those without a DVD drive in their system, installation becomes a challenge. If your system lacks a DVD drive or you prefer not to burn a DVD, Windows 10 can be installed with the help of a Pendrive. Firstly, you’ll need to create a bootable Windows 10 pen drive, and it must have at least 8 GB of storage.
How to Create a Bootable Windows 10 Pendrive/USB Drive:
Create bootable USB drive the easy way
For a hassle-free experience that doesn’t require separate tools for different operating systems, Rufus is an excellent choice. It boasts simplicity and ease of use, automatically detecting your drive letter and capacity, allowing you to easily identify the device you are formatting. Rufus is faster than other tools and stands out as the preferred option for users due to its user-friendly interface.
1. Begin by downloading the Rufus software, which is compact at less than 1MB and easily executable on Windows.
2. Once downloaded, copy it to your desktop.
3. Attach the Pendrive to the USB drive.
4. Now, click on Rufus and select the “Run As Administrator” option from the context menu.
5. If the User Account Control dialog box appears, click “Yes” to confirm.
The main Rufus window will appear. Now, select the options as follows:
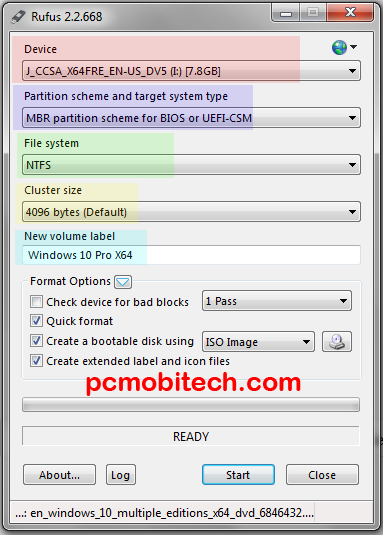
(a) Device – Choose your Pendrive from the available options.
(b) Partition scheme and target system type – Opt for the MBR Partition scheme for BIOS or UEFI.
(c) File System – Select the NTFS option.
(d) Cluster size – Maintain the default setting.
(e) New Volume label – Decide on the name for the bootable Pendrive. Initially, choose the ISO Image of Windows 10.
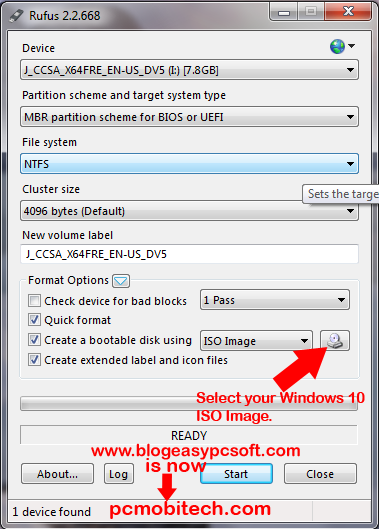
(f) Stick with the default options. If you’ve already downloaded Windows 10, click the drive icon next to “Create a bootable disk using the ISO image option.”
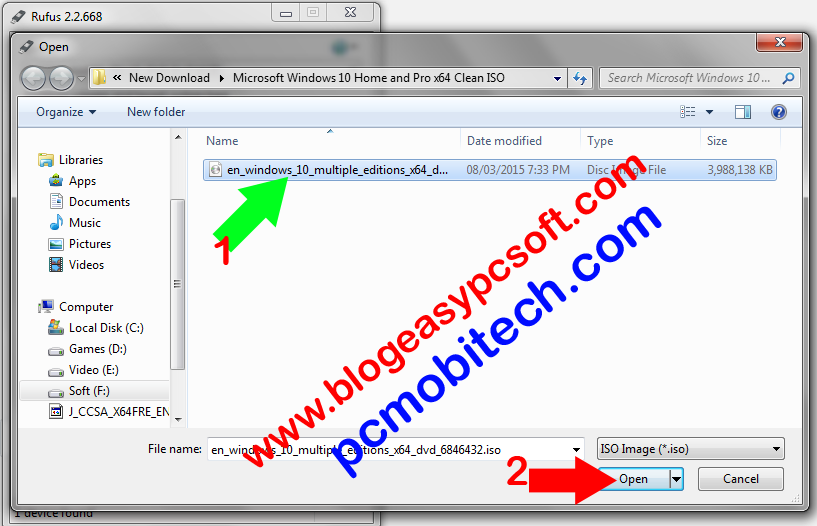
(g) In Windows Explorer, select the Windows 10 ISO Image file, then click the Open button.
If you haven’t downloaded Windows 10 yet, download it first.
Check these posts –
- Download Windows -10 Enterprises (32 bit and 64 bit version)
- How to Download Windows 10 Home, Pro Official ISO?
- How to Download Microsoft Windows 11?
(h) Finally, click on the Start button.
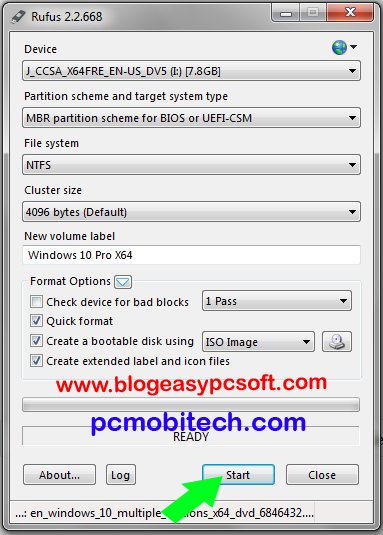
Rufus will now copy all the Windows 10 installation files to the Pendrive. The process may take about 10 to 20 minutes, depending on your Pendrive’s speed.
Thanks for taking the time to read this post! Feel free to share it.
When you purchase through links on our site, we may earn an affiliate commission. Read our Affiliate Policy.


Now we want to prepare the USB drive for the Windows 10 files and ensure it is bootable. Type “create partition primary” without the quotes and hit enter.